Archive for May 2016

Celebrate Friday!

Friday, May 27, 2016

I thought we could celebrate Friday by watching silly youtube videos that make me laugh. I sure hope they give you a good giggle too!


And my favorite, Kristen Wiig as Doonece. It's not on youtube, you have to click through here. This skit is especially funny if you, like me, can remember laying on the carpet in your Grandma's house watching The Lawrence Welk Show with the lights off and a groovy fiber optic lamp softly changing colors on the side table.

Tips For Planting Succulents Indoors

Thursday, May 26, 2016

tips for growing succulents inside
Here is what I know: I love succulents, you love succulents, we love succulents...but they have proven darn hard to keep alive inside our homes! Happy patio succulents? Sure. Gracing our coffee tables and bookshelves? Not so much.

But we want them on our tables and shelves; they are so pretty and interesting and let's just admit it on trend.

With this burning desire I have researched tons of articles online trying to glean the secrets that might end my reign as a plant killer. I'm not going to pretend to know it all now, but I have managed to keep my little group of Costco succulents alive and in my house for over a month now. They are even growing.

I've applied three tips that I've gained from my reading and pestering of people who know.
1. Plant them properly for growing indoors. More details on that in a minute.

2. Only water when the soil is dry, approximately once a week and water low to the soil because the leaves don't like to be wet. I used to use a mister but now I pour a little water near the base of each plant in the container.

3. Place your succulents in a room where they will get plenty of indirect light.

My directions for how to plant a terrarium for indoors are primarily from Leaf and Clay. It is a fabulous website with TONS of information on succulents. I keep going back for advice and if you are serious about growing succulents their blog is an excellent resource.

So here is a summary of what I learned there.
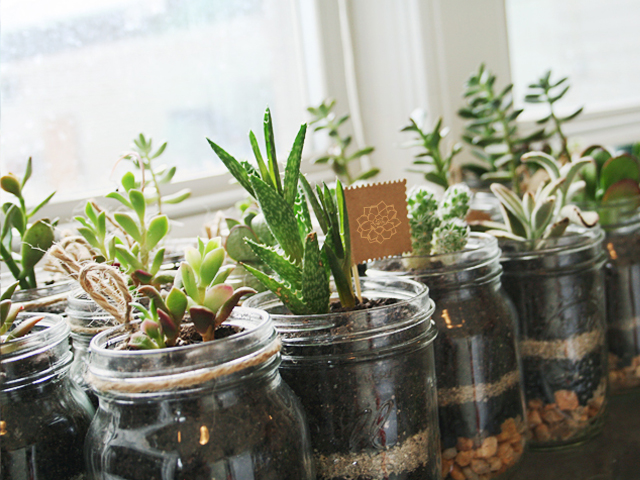
how to plant succulents indoors
Start with a container you like. This method assumes that your container won't have drainage which is nice and allows for a lot of freedom to choose whatever you think is pretty. Here are some of my favorites from around the interwebs :-)
//via//
These little air plant containers are actually pretty cheap at the craft store.
mason jar terrarium
//via//
Mason jars! I need to get on this; I have tons of jars left from Maddie's wedding.
I can't find the link for the original source of this photo but lets just all agree that these geometric planters are fabulous!
succulents in apothacary
//via//
And apothecary jars, I just have to toss out all the hotel soaps that are in mine right now :-)

Start by filling the bottom with rocks or pebbles. This gives the water a place to drain to so the roots don't sit in wet soil and rot. Yay.

Add about an inch of activated charcoal. 

Top with a layer of moss. The moss keeps the soil from sneaking down into the rocks.

Now put in your special for cacti and succulent potting soil. Leave room for your plants and and a final layer of soil.

Leaf and clay recommends that when you transplant a succulent to the new container you "gently loosen the roots, brushing away old soil." I did do this although as I brushed away soil I'm afraid some of the roots went along with it. I guess I'm just saying to be careful my friend.

Dampen your dirt sparingly and then place the succulent in a shallow hole in the new container and stabilize with more soil.
Most of the articles I read recommend that you now wait at least a week before you water your baby plant.

As a final touch I like to add a layer of rocks over the top of the soil, and, if you want, a gnome. I cannot think of any reason why you would skip the gnome.
succulent garden with gnome


Girls Trip to Napa

Friday, May 20, 2016

Last weekend I was in Napa with my two gorgeous friends, Leah and Lacie. The weekend was mainly organized by Lacie, and I believe she has a future as a travel agent or maybe cruise director on a very fancy, very expensive ship. I was awesome. Okay, I see that typo, I meant to say "It was awesome," but I'm leaving that Freudian slip in there because I was awesome-I am EXCELLENT at dining, shopping, laughing, spa-ing, and I found a fabulous pair of sandals too. 

When she first texted our itinerary I immediately texted back that I loved it so much I would marry it. We stayed at the beautiful Meritage Resort. I didn't get a great photo of how lovely it is but I did steal this one from the internets. 

And this one.
It was a little too breezy for us to lay out but we did enjoy sitting by the fountain and telling inappropriate stories.
On Saturday we went to a little spa in Calistoga and had massages and mud wraps. Because mud wraps were on my bucket list. Don't judge! It was super fun and very relaxing but to be honest, I don't think they do much as a beauty treatment. It is supposed to be like a giant clay mask that detoxifies your whole body. Maybe it did, I don't know how you would tell, but I didn't feel any different.

We took a picture but I'm not sharing it. 

No, you can't talk me in to it.

Here, look at this one.
This is Celadon, where we had lunch on Friday.

And this is at the Calistoga Inn where we had lunch after the spa.
It's a hard life, but somebody has to live it. Later we did some shopping in adorable St. Helena. 
image via
There is a fantastic chocolate store with all handmade chocolates, called Woodhouse Chocolate.
The chocolates are $2 a piece but SO yummy!
We also went in a shop with this giant sparkly dragon.
I LOVE dragons, but I still want to know who buys this and where do they put it? I've never been in anyone's home with something this, ah, magnificent. Marc tells me it will not be in our home...

There were plenty of great, clothing and jewelry shops too. My favorite was a home store with a huge collection of John Derian plates that left me drooling and wishing I had room to add to my plate wall.

But really, the best part of the trip was getting to talk about everything under the sun with these two fantastic women. We laughed so hard, dissected our parenting strengths and weaknesses, shared make-up and shoes, revealed some of our most difficult struggles and kept telling each other how much we love each other.

They both made me feel so loved and accepted and valued. Let's end with my favorite photo from the trip.
I call it, "I don't know why my eyes are closed, but so what, I'm dating two super models."

Guest Post by Monica: Tips for Getting Decorating Done, Even With Kids

Wednesday, May 18, 2016

Hi, you! I’m swapping blogs with my friend Monica today. She has amazing taste and is like a project completing machine in her lovely home!  I asked her to share the secret sauce she uses to get it all done with three littles in the mix.  I think you’re going to love her.  Oh, and I’m writing about what scares me over on her blog aboutprogress.com.  Come see me too!
Hello!  My name is Monica and I blog at aboutprogress.com.  My blog is about making progress in our lives without hyper-focusing on perfection.  Come visit me there to see posts on food, parenting, exercise, interior design, DIY and more!  (I’m a bit all over the place…)  I am also a mom of three littles, ages 4, 3, and 10 months.  (That’s why I’m all over the place!)
We’ve owned our little home for 3 ½ years.  It is still in its original glory, ala 1949.  We have loved every square inch of it and worked hard to improve it with what pennies we could spare.  I love interior design, so I’ve always got a project up my sleeve. Here is a sampling of the projects we have personally done ourselves:
Painted 6 rooms, two of them twice.
Painted ~20 furniture items from Salvation Army and Craigslist.
Painted the whole exterior of the house, including the trim.
Made an upholstered headboard.
Replaced a toilet.
Installed light fixtures inside and outside the house.
Removed and replaced an old brick mailbox.
Pulled out a million weeds and little trees growing on our front lawn.
Rehabbed our front and back yards.
Filled in a doorway, making a better entrance into our house.
Created a brick barrier along the sides of our backyard.
Re-hauled our fireplace including demolition, tile installation, and refacement.
(And a 100 other small DIY things, including lots of IKEA hacks and organization.)
Hi, you! I’m swapping blogs with my friend Monica today. She has amazing taste and is like a project completing machine in her lovely home!  I asked her to share the secret sauce she uses to get it all done with three littles in the mix.  I think you’re going to love her.  Oh, and I’m writing about what scares me over on her blog aboutprogress.com.  Come see me too!  [Optional Post title: Guest Post: House Projects with Young Children]  [Family Photo Here]   Hello!  My name is Monica and I blog at aboutprogress.com.  My blog is about making progress in our lives without hyper-focusing on perfection.  Come visit me there to see posts on food, parenting, exercise, interior design, DIY and more!  (I’m a bit all over the place…)  I am also a mom of three littles, ages 4, 3, and 10 months.  (That’s why I’m all over the place!)   We’ve owned our little home for 3 ½ years.  It is still in its original glory, ala 1949.  We have loved every square inch of it and worked hard to improve it with what pennies we could spare.  I love interior design, so I’ve always got a project up my sleeve. Here is a sampling of the projects we have personally done ourselves:   Painted 6 rooms, two of them twice. Painted ~20 furniture items from Salvation Army and Craigslist. Painted the whole exterior of the house, including the trim. Made an upholstered headboard. Replaced a toilet. Installed light fixtures inside and outside the house. Removed and replaced an old brick mailbox. Pulled out a million weeds and little trees growing on our front lawn. Rehabbed our front and back yards. Filled in a doorway, making a better entrance into our house. Created a brick barrier along the sides of our backyard. Re-hauled our fireplace including demolition, tile installation, and refacement. (And a 100 other small DIY things, including lots of IKEA hacks and organization.)   [Fireplace photo here]   My husband is great and has really been a partner on those bigger projects, but he can only help on Saturdays—so I’ve done most of that above list myself.  And 100% of the time, my young children were present, alive, and (mostly) well fed.   People often ask me, “Monica, how do you do it all?  How do you do all your house projects with those young kids at your feet, constantly asking to be fed?”   Just kidding!  Nobody asks me that.    But if they did, here’s how I’d say we’ve done so much around this little house despite our well-meaning “helpers:”   1)   When the Cat is Away…: Most of what I do is when the kids are asleep: naps or at night.  That means my “me” time is gone during our more time-consuming projects and my own sleep is limited, but I don’t have to worry about them drinking paint or accidentally hurting themselves with my tools.  2)   Get Them Distracted: Sometimes, the kids have to be around when I’ve needed to do something that doesn’t involve endangering them.  I’m thinking things like plastering nail holes, yard work, laying out a tile design, sanding furniture, or hanging things.  I’m not a huge fan of letting my kids have more than 20 minutes of screentime a day.  (When I do, they act like entitled demons. Seriously.)  So it’s worth it to me to take a few more minutes and get them properly set up with a real activity that will keep them busy.  That entails: finger painting, coloring, doing puzzles, playing with their trains/dollhouses (or whatever toy(s) they recently forgot about), etc.  Sometimes, it also means just shuffling them into the backyard with some bubbles, chalk, or a snack, and giving them a time limit before they can come back in.  (I actually set the timer, so we’re both accountable!)  If a project is necessary to do during the day and the kids aren’t cooperating (or it’s simply unsafe for them to be around), I turn to my next tip… 3)   Trade Off:  Brad and I largely team-tagged our fireplace project during the day a few Saturdays in a row.  Trade off with a spouse or even a friend when you need to get things done during the daylight hours.  For example, we’ve had a friend watch our kids so my husband and I could make a big Home Depot run.  Get your friends in on it and return the favor! 4)   Get the Kids Involved: This one is trickier.  Obviously, you can’t let your young children help paint and use power tools.  But sometimes, I give my child an unused paintbrush, a cup of water (or no water!) and ask them to “paint” a certain section of the wall or piece of furniture.  Keep in mind, that still entails careful instructions and mom’s attention. We have found that yard work is a great way to get your kids involved.  When we recently added the brick divider around the fence in our backyard, we had our kids picking up sticks and pulling weeds while we did the hard labor. We were out there for hours at a time. Lately, my older two have been getting paid a cent per plum they pick up from our neighbor’s tree along our shared fence.  A lot of encouragement and rewards go a long way in simultaneously helping your kids be entertained and learning the value of hard work.   Finally, when all else fails, just turn on a dang show!     And since I’m all about progress, not perfection, I thought I’d end this post with a picture of what my house looks like mid-project.  You are welcome. [Picture of messy home.]     What tricks do you parents have up your sleeve for getting house projects done with kids?

My husband is great and has really been a partner on those bigger projects, but he can only help on Saturdays—so I’ve done most of that above list myself.  And 100% of the time, my young children were present, alive, and (mostly) well fed.
People often ask me, “Monica, how do you do it all?  How do you do all your house projects with those young kids at your feet, constantly asking to be fed?”
Just kidding!  Nobody asks me that.
But if they did, here’s how I’d say we’ve done so much around this little house despite our well-meaning “helpers:”
1)   When the Cat is Away…: Most of what I do is when the kids are asleep: naps or at night.  That means my “me” time is gone during our more time-consuming projects and my own sleep is limited, but I don’t have to worry about them drinking paint or accidentally hurting themselves with my tools.
2)   Get Them Distracted: Sometimes, the kids have to be around when I’ve needed to do something that doesn’t involve endangering them.  I’m thinking things like plastering nail holes, yard work, laying out a tile design, sanding furniture, or hanging things.  I’m not a huge fan of letting my kids have more than 20 minutes of screentime a day.  (When I do, they act like entitled demons. Seriously.)  So it’s worth it to me to take a few more minutes and get them properly set up with a real activity that will keep them busy.  That entails: finger painting, coloring, doing puzzles, playing with their trains/dollhouses (or whatever toy(s) they recently forgot about), etc.  Sometimes, it also means just shuffling them into the backyard with some bubbles, chalk, or a snack, and giving them a time limit before they can come back in.  (I actually set the timer, so we’re both accountable!)  If a project is necessary to do during the day and the kids aren’t cooperating (or it’s simply unsafe for them to be around), I turn to my next tip…

3)   Trade Off:  Brad and I largely team-tagged our fireplace project during the day a few Saturdays in a row.  Trade off with a spouse or even a friend when you need to get things done during the daylight hours.  For example, we’ve had a friend watch our kids so my husband and I could make a big Home Depot run.  Get your friends in on it and return the favor!

4)   Get the Kids Involved: This one is trickier.  Obviously, you can’t let your young children help paint and use power tools.  But sometimes, I give my child an unused paintbrush, a cup of water (or no water!) and ask them to “paint” a certain section of the wall or piece of furniture.  Keep in mind, that still entails careful instructions and mom’s attention. We have found that yard work is a great way to get your kids involved.  When we recently added the brick divider around the fence in our backyard, we had our kids picking up sticks and pulling weeds while we did the hard labor. We were out there for hours at a time. Lately, my older two have been getting paid a cent per plum they pick up from our neighbor’s tree along our shared fence.  A lot of encouragement and rewards go a long way in simultaneously helping your kids be entertained and learning the value of hard work.
Finally, when all else fails, just turn on a dang show!
And since I’m all about progress, not perfection, I thought I’d end this post with a picture of what my house looks like mid-project.  You are welcome.
What tricks do you parents have up your sleeve for getting house projects done with kids?

My Non-Traditional Emergency Car Kit

Friday, May 13, 2016

So you all know what an emergency car kit has in it, stuff like flares, and flashlights and reflective vests etc. And clearly we should all have those things, but, frankly, the kind of emergency I regularly encounter in my car has nothing to do with mechanics or breaking down. 

Nope.

The kind of emergency that happens to me more and more frequently these days is one where I flip down my mirror visor to check my lipstick and the sun shines it's happy rays across my face and Oh. My. Freaking. Gosh. There is ANOTHER stupid neck hair glowing away on me.

Marc hates when I say this, but sometimes I feel like Jonathan and I are in a race to see who can grow a beard first, the 17 year old young man in the throws of puberty, or the 45 year old pre-menopausal woman.

I'm very uncomfortable with winning. Which is why I invented my emergency car kit!
The emergency car kit addresses some of my most common and reoccurring car emergencies. I sound like a total infomercial babe don't I? Cool.  Feast your eyes ladies and (I kind of hope just ladies) on all the fabulous products found in The Patented Shelley Emergency Car Kit for Women Over Forty:
First and foremost, TWEEZERS, for the neck hairs. Those hairs are very sneaky and dishonest. I can't even see them when I'm getting ready in front of the bathroom mirror. They lie in wait until I'm in my car where they feel like it's safe to reveal themselves but now BAM! I can get them with my tweezers. Take that stupid hairs!

I also like to keep a mini mani set in there because sometimes, when I'm stressed, I can really do a number picking at my nails and cuticles. But with my little kit sitting right there then when I'm waiting at school pick up or whatever I can file down any rough spots, use the cuticle trimmer to cut any hangnails and rub in some hand cream if I happen to have lizard hands just then.

And Bonus! The average red light is scientifically proven to be just the right amount of time to massage a bit of cuticle cream into your dry nail beds making your hands look so much better.

I also keep a package of make-up removing wipes in case along with the renegade hair I notice I've got raccoon eyes, because that IS an emergency, a little hair brush, and eye drops because I have the worst eyeball allergies ever.

You might be wondering why I don't just keep all of this in my purse. Well for one, my purse is already full enough, although there are some duplicates, mainly the hairbrush and eye drops. But the main reason is because having everything right there in my dash makes taking care of these little "emergencies" so much easier for me.
That's like, a live action shot of my kit doing it's job, ever at the ready to rescue me!

So what about you? Anything you can think of to add to the kit? I'd love to hear your ideas.


A Little Bit of Catch Up and Mormon Prom Pics

Wednesday, May 11, 2016

I had a lovely Mother's Day weekend, in part because it rained so I didn't have to help Marc with a massively overdue dump run. I hope yours was nice too. We were pretty low key, but spending time with my family is exactly what I wanted this year; Jonathan and Ellie are growing up so fast it is just killing me. I desperately want to slow things down but I'm acutely aware from past experience that it ain't happening. Sad face.

Anyway, here is a quick recap of some stuff that's happened here. I have a couple of posts in the works that are taking me longer to write than I expected so this is sort of a filler.

Okay, you may have already seen this if you follow me on Facebook but here is the cake I made for Jonathan to use when he asked his friend to Mormon Prom.

I know it's ugly as heck, but I'm still so pleased that he was able to give me that photo and on very short notice (like on the spot) I was able to make a cake that is at least recognizable as a sad, weird frog. Yes! Yay me I can make sad frog cake! I know...I just like doing things for my kids, and Jonathan rarely needs me for stuff these days.

Here he is asking the girl.
And here they are before the dance.
Aren't they just so cuuuuuuute?! Here are a couple more for fun.
I seriously love these kids and their fun friendships make my mom heart happy.

What else? Oh! here's a pic of Jonathan and Ellie on Sunday.
Why so big guys? Stop it.

And that's about it. We saw Captain America: Civil War; I give it five barnacles. 

We played the D.C. Deck Building game with Jonathan and me against Marc and Ellie and my team WON! Happy Mother's day to me because I never win that stupid game.

And on Sunday we spent the evening with my mom and dad and my aunt who is staying with them. I made dinner because I am the auxiliary mom when we get together, BUT I did not have to do the dishes so WIN!

Okay friends. Have a fantastic hump day and stay classy! 


Maddie and the Bishop

Thursday, May 5, 2016

Maddie circa 2000
My sweet Maddie came for a surprise visit this weekend. It was so nice to see her, and of course we played the whole time. I'm super glad we got to play, but I'm feeling sort of behind this week since I didn't do most of the items on my not-nearly-as-fun-as-hanging-with-Maddie to do list.

I need to do LOTS of sewing since I'll be at an open house with my friend Tina this Friday from 6-9 p.m. She is a graphic designer who makes fantastic hand lettered signs, and I'll be selling my zipper pouches and lavender sachets. It would be awesome to see you there, the address is 2328 St. Augustine Drive in Brentwood, CA. It's a good time to buy a last minute Mother's Day gift, or one for graduation or even Father's Day.
BUT, I am taking a little break from sewing to share a story with you that is near and dear to our family's heart. It is, Oh best beloved (that phrase has been on my mind ever since seeing The Jungle Book), about Maddie and the Bishop.

When Maddie was a tiny shiny of just seven years she had a Sunday school teacher, and not just any Sunday school teacher. Her teacher was what some might call "a general in God's army." She was a retired school teacher and boy oh boy did she take her Sunday school class seriously. She was the kind of lady who does everything 110%! Her students were expected to do homework each week in preparation for the coming Sunday lesson, and to be honest, as young parents we were a bit frightened of what might happen if Maddie showed up to class without it.

In our church most members pay tithing of 10% of their income to the church. It is a principle that has blessed my life dearly and I am grateful that I've been able to do it. When Maddie's weekly homework was to do a chore, get paid for it, and meet with her teacher the next Sunday to take her little 10% and give it to our sweet Bishop I was totally happy to help make it happen.

During the week I gave her a few easy chores, paid her, and showed her how to save 10% for tithing. We talked about how the money is used to help run the church and help people in need. I really thought I had this particular homework assignment in the bag.

Maddie was SO proud of herself! On Sunday she kept her little quarter in her purse and waited with anticipation for her turn to meet with the Bishop. Sister * (not even going to type her name here) asked Marc and I to meet her and Maddie in the Bishop's office after Sunday school but Marc had another meeting so it was just me with baby Jonathan on my hip and a five year old Katie in tow.

Our Bishop was about the kindest man you can imagine. I really loved and looked up to him. Sister * prompted Maddie to give the Bishop her tithing and when she did he told her how proud he was of her and then asked her what she did that week to earn her allowance.

I wasn't sure if she knew what "allowance" meant and was preparing to explain it to her, but I needn't have worried.

She piped right up and announced, "Oh, my mom paid me to watch my brother and sister while she and my dad took a shower."

No! You are thinking.

Oh yes, I am confirming. She said that. In front of our Bishop and her General in God's Army Sunday school teacher.

In the millisecond it takes to consider these things I constructed and discarded a hundred explanations I could try and give for her announcement before deciding that the only clear solution was to beat a hasty retreat. I grabbed Maddie by the hand, said, "have a nice afternoon," to everyone, and rushed my flaming red self and my three holy terrors outta there!

Yes, they are all guilty by association!

The only consolation was when I was lamenting over the incident to my friend Paige and she wisely comforted me by saying, "It probably makes the Bishop happy to hear you and Marc still shower together; it means he doesn't have to worry about you." 

Please, please just let him forget she ever said it!


How to Make A Lavender Sachet for Mother's Day

Monday, May 2, 2016

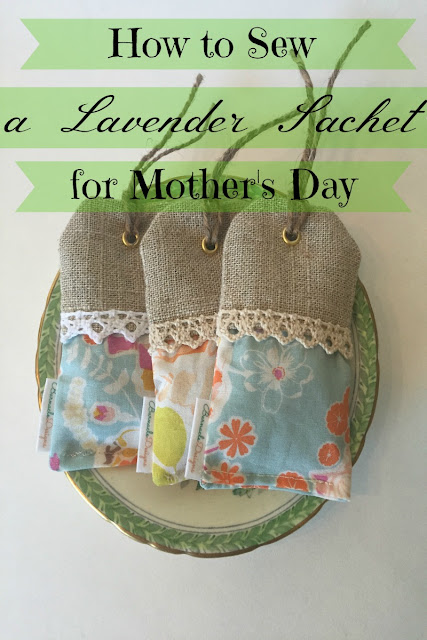
Lavender Sachet DIY
I listed these sweet little lavender sachets in my etsy shop on Friday, but they are so fun to make I thought I'd write up a tutorial in case you want to sew some yourself. They make the sweetest Mother's Day gifts; the lavender smells so fresh and good, they are dainty and a tiny bit old fashioned, and they make you feel like a lady when you tuck one in your drawer or under your pillow. They are a lovely little gift on their own and are super sweet tied onto another package.

I was originally inspired by this photo I found on Pinterest,

but the instructions are in French, which I speak about as well as Joey.
So I had to figure it out myself. Here's how you do it...

1. Cut 3" fabric strips from two fabrics. One needs to be a thicker fabric like the burlap-ish one I chose here to be able to hold the eyelet. If you use two quilting weight cottons then you'll need to use interfacing per the eyelet kit instructions to stabilize the fabric.
2. Sew the strips right sides together along one edge. Open up and iron the seams toward the darker fabric.

3. Fold the fabric in half length wise and cut out two tag shapes using paper pattern.
I printed this picture, cut it out, and used it as my pattern.
4. Leave about a 1/8" seam allowance around the pattern as you cut.
5. Sew a small piece of lace over the seam of both pieces of the sachet.

6. Place right sides together and sew around the edge leaving the entire bottom open for filling with lavender. Turn the sachet right side out using a chop stick or pencil to gently push out all of the corners. Be careful not to poke a hole through the seam!

7. Use an eyelet plier kit (link to the one I used here) to poke a hole through both layers of fabric and to insert the eyelet. I took the below photo before I learned that the eyelet won't stay in the quilting cotton unless it's been stabilized with interfacing. After that all my sachets have the burlap fabric on the top.
8. Fill the sachet with lavender. The easiest way is to leave the entire bottom of the sachet open and just spoon in the lavender. I tried leaving a smaller opening and pouring the lavender in through a paper funnel and it was not nearly as quick and clever as I imagined it was going to be. In fact, it was kind of a pain.
Again, I recommend just leaving the whole bottom open, and after adding two tablespoons of lavender either whip stitch the bottom closed by hand or sew it closed with your machine.

If you want to make these for Mother's Day you'll need to buy lavender locally, I found some in the tea section of Sprouts Market; if you just want to make some there are great deals on organic died lavender on Etsy. Just search for dried lavender.
Sew a Lavender Sachet
If you'd like to buy some of the ones I made you can order a set of three for $19 here and I will wrap them beautifully and send them off to your sweet mom so she can have sweet dreams.


Use the coupon code MOM10 for 10% off at checkout until May 4th.
How to Make a Lavender Sachet
Happy Sewing and Happy Mother's Day!

Linking up at:


Copyright © Barnaclebutt | Premade Blog Design by Lilipop Designs