Archive for April 2016

How to Hang a Plate Wall with No Stress or Measuring

Tuesday, April 26, 2016

How to Hang a Plate Wall
Did you want to make a plate wall to cover up some big naked wall space that you have?

But when you google "how to design a plate wall" and see photos like this your eyes glaze over and you think you would rather chew off your own hand than trace all your plates, cut out templates, measure where they go and try to arrange them on your wall?

Me too! I just can't.

Which is why I'm sharing my super spiffy tips for...wait for it...

How to Hang a Plate Wall without Measuring
That's my lovely creation right there and I'm not ashamed to admit that I have a big fat dishy crush on it! I want you to feel the same way about your wall so let's begin with a little plate psychology to get you prepped to hang without stress and without measuring.

First, it's 100% okay to have TONS of nail holes in your wall from hanging a plate, deciding it's not right, and moving it 1/2 of an inch. If I had hung my plates exactly how they are now on the first try I'd still have 20 holes in my wall-there's no way that when I'm ready to take them down I won't have to fill and paint.

So who cares if you have to fill 20 holes or 60 holes? It's just a quick swipe of spackle; no trouble at all!

eclectic plate wall
Second, I'm sorry, but this idea I see everywhere that you're going to arrange your plates on the floor and then hang them on the wall is ridiculous! Your plates don't look the same on the floor as they do on your wall. The final look is totally affected by your wall color and the furniture, doors and windows surrounding the plates. You just can't tell what will really work until those plates are on the wall!

The one thing you really do need to hang a plate wall is a friend. There is a lot of holding a plate up to the wall and asking, "here or here?" You need someone to help with that, and if that friend wants to hang a plate wall too, all the better, you can help each other!

A quick note-I used E600 and a safety pin to hang my lighter plates. Be sure to let it cure for 48-72 hours.
And these 4" disc plate hangers for my bigger plates. If I wasn't sure then I went with the disc hanger; they are super secure!


Okay, on to the actual hanging. Since we're not measuring it's better to pick an organic shape than a totally symmetrical shape. There are a lot of beautiful examples out there.


Here are a couple of my favorites. This first one was also my color inspiration before I even began collecting plates.
Via
Soula_plates
Via
That up there is the wall I made with my friend Tonya who then was obligated to come help me hang my plate wall!

For my wall I imagined a football shape that was being thrown up towards the right corner of the wall.
I didn't try to "fill in" the imaginary line exactly, I just used the general idea to help me get started.

Pick your favorite plate and hang it in the middle of your imaginary shape.
It looks all weird and lonely. Save it by adding two more plates around it. Don't stress because you've already decided that if you don't like something you'll just move it.
Hmmmm, after I hung that we decided the F plate was a leeetle too close to the pears. We tried a different shaped plate and liked it better. The F actually ended up on the other side of the pear plate.
Keep working out from the middle and filling in the space evenly. Have one person hold up a plate while the other person steps back a bit and checks for balance in colors and shapes. When it looks right use a pencil to make a small mark on the wall where the top of the plate is. Flip your plate and check how far down the hanger is and make another mark that far down from your first mark and hammer a nail in that spot.

As you back up and check your arrangement you can always swap out plates to see how different sizes and colors look. 

This is where the extra set of eyes is better than all the measuring in the world. My friend Tonya and I noticed that we each were more confident in making decisions at the other person's house-kind of funny, but true.

My final tip is to avoid a static look by breaking up your imaginary lines with some plates that "go outside the line."

On my wall the white plate with yellow butterfly balances the blue plate with flowers in the middle and they both help keep the arrangement from feeling too deliberate.
Good luck with your own plate wall! They are super happy making.

Mid-Century Modern Buffet Painted in Paris Grey

Friday, April 22, 2016

Mid-century Modern Credenza painted Paris Grey
VoilĂ ! I finished the first part of my plan for decorating the dining room by painting the mid-century modern buffet. 

As a reminder, here's what it looked like when I bought it off of Craigslist.
Great lines and not even a bad wood color, but not a wood color that looked good in my dining room.

So, surprise! - I painted it. Frankly, things aren't moving along as fast as I would like, but then, when do they ever? I'm a girl who LOVES immediate results and waiting for paint to dry and sanding between coats drives me crazy even though I know it's imperative for good results.
Mid-Century Modern Buffet painted with ASCP in Paris Grey
I painted this buffet/credenza with Annie Sloan Chalk paint in Paris Grey and the color is phenomenal. It's finished with clear wax and there is no distressing on this piece.

In my opinion mid-century modern furniture should NOT be distressed. It just looks weird.
Want a peek at the inside, just for fun? I got some good shots of how I paint the inside of a dresser so that it looks clean and tidy but I don't have to spend a lot of time or paint covering the whole inside.
how to paint the inside of a dresser
I use a 2" angled Purdy paint brush; it makes it fairly easy to cut nice lines just along the inside of the drawers. If you don't feel confident in your cutting skills just use some blue painters tape to mark your edges.

This is the way I usually finish the inside of a dresser when I'm painting for a client since I know when they pick it up they'll usually take out the drawers to move it and I want everything to look professional.
The picture and things on the buffet are just props for these photos. I cannot wait to get started on the plate wall!
Chalk Paint a Mid-Century Modern Buffet or Credenza
Getting my adhesive for the plates has been a little bit wonky, but I'll tell you about it when I get them hung. Until then, here's a little sneak peak of the plates in progress.
I'd love if you'd follow me on instagram at @barnacledesigns to see updates on the plate wall as it goes up.

Happy Friday Friends! Hope you have a fantastic weekend...mine will be so great all hanging plates everywhere...so exciting...is that weird? You don't have to answer that...we decorating dorks friends  have to stick together.

7 Tips I've Actually Used to Plan a Beautiful Wedding on a Budget

Wednesday, April 20, 2016

I am a firm believer that you don't have to spend a lot of money to have a beautiful home, and the same principle applies to a wedding.

Especially a wedding! 

Brides have all different budgets but every bride (and groom) deserves to have a day that is lovely, filled with joy, and that feels like her dream come true.

Since wedding season is fast approaching, I wanted to share some of the tips and tricks we used to make my daughter's wedding just what she wanted without going (too much) over budget. First figure out the areas you want to splurge (for us it was the photographer and the dress), and then use these tips to get the wedding of your dreams!
DIY tips for a Beautiful Wedding on a Budget
1. HAVE THE RECEPTION AT HOME - One of the biggest expenses for a wedding reception is the venue. If you can have yours at home you can save a TON of money, and any dollars you spend beautifying the place will stay with you long after the wedding. BONUS! 

We had about 80 people at our daughter's reception even though we don't have what you might consider a lot of room. It worked well though because having the tables close together and everyone a tiny bit "cozy" made everything feel fun and festive.
The reception was outside but we still splurged on a house cleaner the day before so everything looked nice when people came in to powder their noses and whatnot.

Even if you aren't able to have the wedding or reception at your own home, you might have family or a friend who is willing to host your party. I've met people with lovely homes who actually dream about hosting a wedding.

Like Marilla says in Anne's House of Dreams by L.M. Montgomery, "...a house was not a real home until it had been consecrated by a birth, a wedding and a death." Obviously you don't want to give birth at someone else's house, but having your wedding there could be nice.

2. BUY THE CAKE FROM A GROCERY STORE BAKERY- a wedding cake starts at around $500; if it isn't on your "splurge list" consider ordering one from your grocery store and prettying it up with flowers. My daughter loves pie so she also enlisted her Grammy and a close friend to make pies for the dessert bar.
 3. DIY THE FLOWERS - A talented florist can make arrangements that are almost magical, but if your budget is super tight you can get a beautiful look making your own with flowers from the local flower mart, Costco, or even Trader Joe's. We filled the back of our car with 5 gallon paint buckets and gallon jugs of water and visited the San Francisco flower mart the morning before the wedding. We knew the colors and mood that the bride wanted and had saved pictures on our phones of her inspiration bouquets and boutonnieres. We concentrated on flowers in the same color family and with the same textures as the the ones she loved. Don't forget lots of greenery for adding volume.

An artistic friend and my artistic daughter (the maid of honor) made the bouquets, corsages and boutonnieres the day before the wedding and we kept them refrigerated overnight.
DIY Bridal Bouquet
Here is the beautiful bride with all of her bridesmaids-and their flowers.
There are lots of tutorials online and on YouTube for making your own bouquets and boutonnieres; in the weeks before the wedding we studied up and even bought flowers and did practice runs.

For the centerpieces we stuck with simple flowers in mason jars and bud vases, and then went for masses of flowers in every vase we could collect on all the other tables.
4. TWINKLE LIGHT THE HECK OUT OF EVERYTHING-candles and twinkle lights make the most humble space seem like a fairy garden when the sun goes down. Use them liberally. There are never too many!
5. DIY THE WEDDING FAVORS-I made jam and my daughter made darling labels for her favors. It was super cheap and everyone loved it. We have bees and also had honey in some of the jam jars. 
Homemade Jam Wedding Favors
Succulents are so on trend right now. If I were planning a wedding today I'd probably do succulent babies for favors. You can order 40 cuttings for $28.95 from this shop, and a set of 12 mini mason jars for $6 here.
Adorbs right?!

6. MAKE YOUR FRIENDS BE THE ENTERTAINMENT-Forget hiring an expensive DJ, make your friends be the entertainment! Chances are there is someone in your circle who is a wanna be musician and would be happy for the exposure that playing at your reception would give them. Ask them if they might play for a little while as your wedding gift.

Don't expect your friend to preform the whole time for free if you want them to still be your friend. Ask what they feel comfortable with and gratefully accept that. 

Live music adds something special to a party so don't give up if you don't have a close friend who can do this. Think outside the box and ask around a little bit, maybe someone has a kid whose done a million years of high school band and would be able to play the guitar, flute or violin in the background for awhile?
My daughter's bridesmaid and my son-in-law's groomsmen played and sang at the beginning of the reception and a friend of ours who is a professional singer sang, "The Way You Look Tonight," while Maddie and Marc had their father daughter dance.
7. DON'T FORGET THE SPECIAL TOUCHES THAT MAKE YOUR WEDDING UNIQUE TO YOU!- Probably the best thing you can do to make your wedding feel custom (code for expensive) is to incorporate the little details that make you smile and make your wedding unique to YOU! After all, if you're having a wonderful time all your guest will too.

Here are a few of the things we did- 
An "EYE-Spy" chalkboard with a list of things for guests to take pictures of on their phones and an Instagram #hashtag for them to share with. We also had a TON of different sodas in glass bottles, because it's fun to drink from a glass bottle :-)
The bride and groom both had comfy shoes for when their fancy kicks started pinching.
Crazy dancing at the end of the reception to a special playlist that the bride and groom had put together of their favorite songs for their special day.

And a sparkler send off so my 15 year old son could burn a hole in his new suit. I am NOT still bitter.
All of the photos in this post were taken by the truly amazing Marielle Hayes of Marielle Hayes Photography. She was on our splurge list and it was so worth it!

If you are here because you are planning a wedding then I am sending you a big internet-y hug and my congratulations! Love is a many splendid thing for sure and I hope this helps you with your plans for a truly magical day. 

My Big Plans For Decorating the Dining Room

Monday, April 18, 2016

My dining room, like basically all of my house, has been a work in progress for some time. Now that I finally finished painting the Duncan Phyfe table and reupholstering the chairs I really want to finish it all up.

All that's left (fingers crossed I don't get any other bright ideas) is to move this guy into the sun room. It's a workhorse of a piece, I bought it used and have had it forever. My plan is to paint it and use it to hold all my fabric stash and organize my sewing stuff.


I know what you're thinking, "Shelley, what are you going to do with all of your dishes?" 

Remember this guy I got on Craigslist a million years ago and have kept in my garage ever since?
I'm going to paint his mid-century modern keister and store my dishes inside. THEN I can finally make a most fabulous and beautiful plate wall above it. Have you been wanting a plate wall? I have. In fact I've been collecting plates for about a year in anticipation of hanging one.

See?
 Although I adore an old world antique-y look, my favorite style mixes modern in too. I'm hoping the buffet will work with what I've already got going on and bring some freshness to the space.

Here is a not very good mock up of my plans.
Let's all cross our fingers that I'll have some progress to show you later this week and that you are able to move along on whatever your decorating hopes are.

Coupon Codes For My Favorite Etsy Shops!

Saturday, April 16, 2016


I'm SO excited to blog today! I got you a surprise present!

DISCOUNTS TO SOME OF MY FAVE ETSY SHOPS!!!

When I was preparing to open my shop, Barnacle Designs, I purchased some of my supplies from etsy sellers and was so impressed with the service and products I received.

Since then I've become a much more avid etsy shopper. There are so many amazing artists, makers and creators showcasing their products there. It's quickly becoming the first place I search when I shop online-before I search amazon or even google.

My first plan for this post was just to share some of the shops I've come to love, but then I thought, "I love my readers and I'm going see if I can get them some discounts because discounts are the best and don't they deserve the best?" You do, friends! Every time you click or comment it makes me so happy and I'm so excited to be able to share this with you.

Here we go!

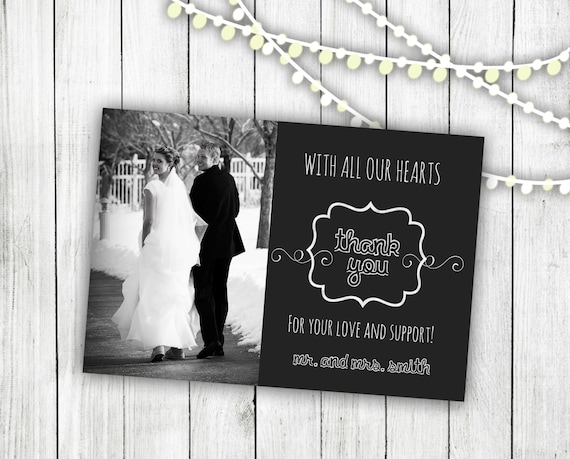
I actually know Diana from Peasy Prints. She is one of the most genuinely kind and thoughtful people. She designed my custom shop banner and was so determined to make it exactly what I wanted (when I didn't even know what I wanted) and kept sending me proofs of different options until it was perfect. I wish I had known about her shop when Maddie was getting married because her wedding invitation designs are really affordable and so charming.
Wedding Photo Thank You Card: Digital File - 4x6
Shop at Peasy Prints by clicking here and use the coupon code SHELLEY (heehee I'm a coupon code) at checkout for 15% off your order!

+++++++++++++++++++++++++++++++++++++++++++++
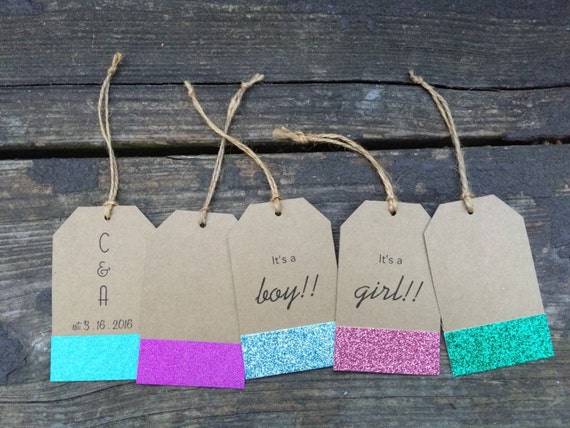
The Pleasant Parcel makes several adorable party supply items and such. My fave of all faves are the custom printed glitter tags. Glitter. Tags. {Insert sigh of happiness here} 
Cardstock tags // Kraft tags // Custom gift tags // custom tags // glitter tags // shop supplies // gift wrap // packaging

Shop at The Pleasant Parcel here and use the coupon code BBREADER10 at checkout for 10% off your purchase. Wouldn't it be awesome to get gift tags with your name on them for Christmas? You'd have the prettiest packages ever!

+++++++++++++++++++++++++++++++++++++++++++++
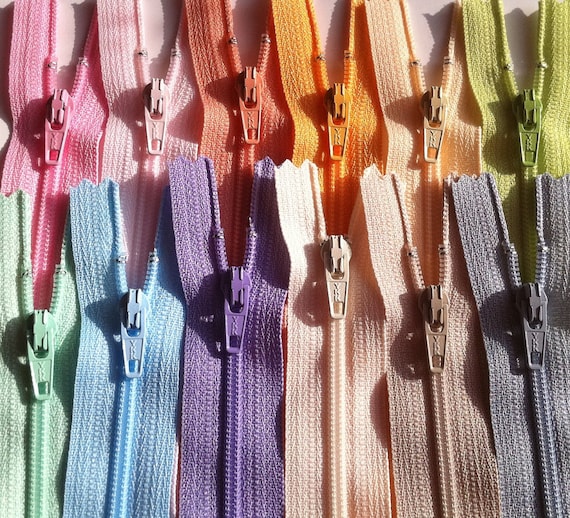
When I was starting Barnacle Designs I spent days scouring the internet for the best deal on zippers for my pouches. I ordered some from a discount place I found on google and was seriously sad when they came and the colors were weak and faded. Then I found Zip It on etsy. I could not be happier with their product! The colors are beautiful and they have hundreds to choose from.
Ykk Zippers PASTEL Sampler Pack- 12pcs- Light pretty colors- Available in 3,4,5,6,7,8,9,10,12,14,16,18 and 22 Inches 
Visit their shop to see all different kinds of gorgeous zippers here and use the coupon code BARNACLEBUTT at checkout for 15% off your oder. This code expires on 10/31/2016.

+++++++++++++++++++++++++++++++++++++++++++++
4 Hats Studio makes completely customized tags for your homemade projects. When I placed my order I was pretty wishy washy about fonts and colors and 4 Hats Studio showed me options and helped me figure out a tag for Barnacle Designs that I love.
If you are making something fabulous, and I know you are, why not tag it? I think it's sweet for sentimental value even if you're not selling your creations. You can work with 4 Hats Studio to design your own tags here and use the coupon code "Barnaclebutt" for 15% off of your purchase until 5/21/2016.

So now it's time for your to get shopping! The customer service from each of these shops was fantastic or I wouldn't be sharing them here. Let me know if get something wonderful!


Copyright © Barnaclebutt | Premade Blog Design by Lilipop Designs